


Developing a UI with Vue, Part 1: Introducing the Project
After working with React for a year and a half, I recently started learning a new framework that I've been crushing on: Vue.js.


React was the first front-end frameworks I got to know. That was a year and a half ago, and I've really enjoyed learning and growing with it. Sure... there are still some things I still don't fully understand, but I'm complicated too! Who am I to judge? 🤷♂️
However, last year I was brought onto a project using jQuery where I was writing a lot of CSS, and it had me wondering whether I liked writing CSS in React at all. That's when I began looking into other frameworks, and developed a crush on Vue.

Why I was crushing on Vue 💚
As a UI Developer I write a lot of CSS, and none of React's solutions were appealing to me. I tried them all: CSS-in-JS, modules, styled-components...all of them had things about them that I didn't quite like (Note: I've since come around to theming with styled-components , and it's now my preferred method in React 👍).
But there were other reasons too:
- I felt that I had hit a wall in React. I began struggling to learn some advanced topics and, frankly, I was trying to move too fast in both the front- and back-end.
- Vue wasn't backed by Big Tech. I don't love the power that Big Tech wields, so I admired the fact that Vue is one of the independent frameworks (I see you too, Svelte).
- I was excited to learn a new framework from square one. The "shiny new object" phenomenon is real! It's easy to get attracted to new tech, and I liked the idea of starting fresh with a new framework.
So with all of this bubbling up, I checked out the notorious Vue documentation. As many have said before me, they are incredibly easy to follow; that's part of the reason I got so hooked on this ecosystem. Plus...
I love how single-file components compartmentalize the JavaScript and allow you to write CSS right inside the file. The v-directives make building components a blast. Vuex was immediately much simpler to wrap my head around than Redux, and between podcasts and great courses online to catch-all repos like this, Vue has a great community behind it.
So let's build a side project 🎉
I figured when I started this blog that I'd be writing about UI-related topics, not building a side project. But since I use React at work and I've been itching for a reason to get back to Vue, I thought it'd be fun to document my experience building with the framework for the first time. So here we are!
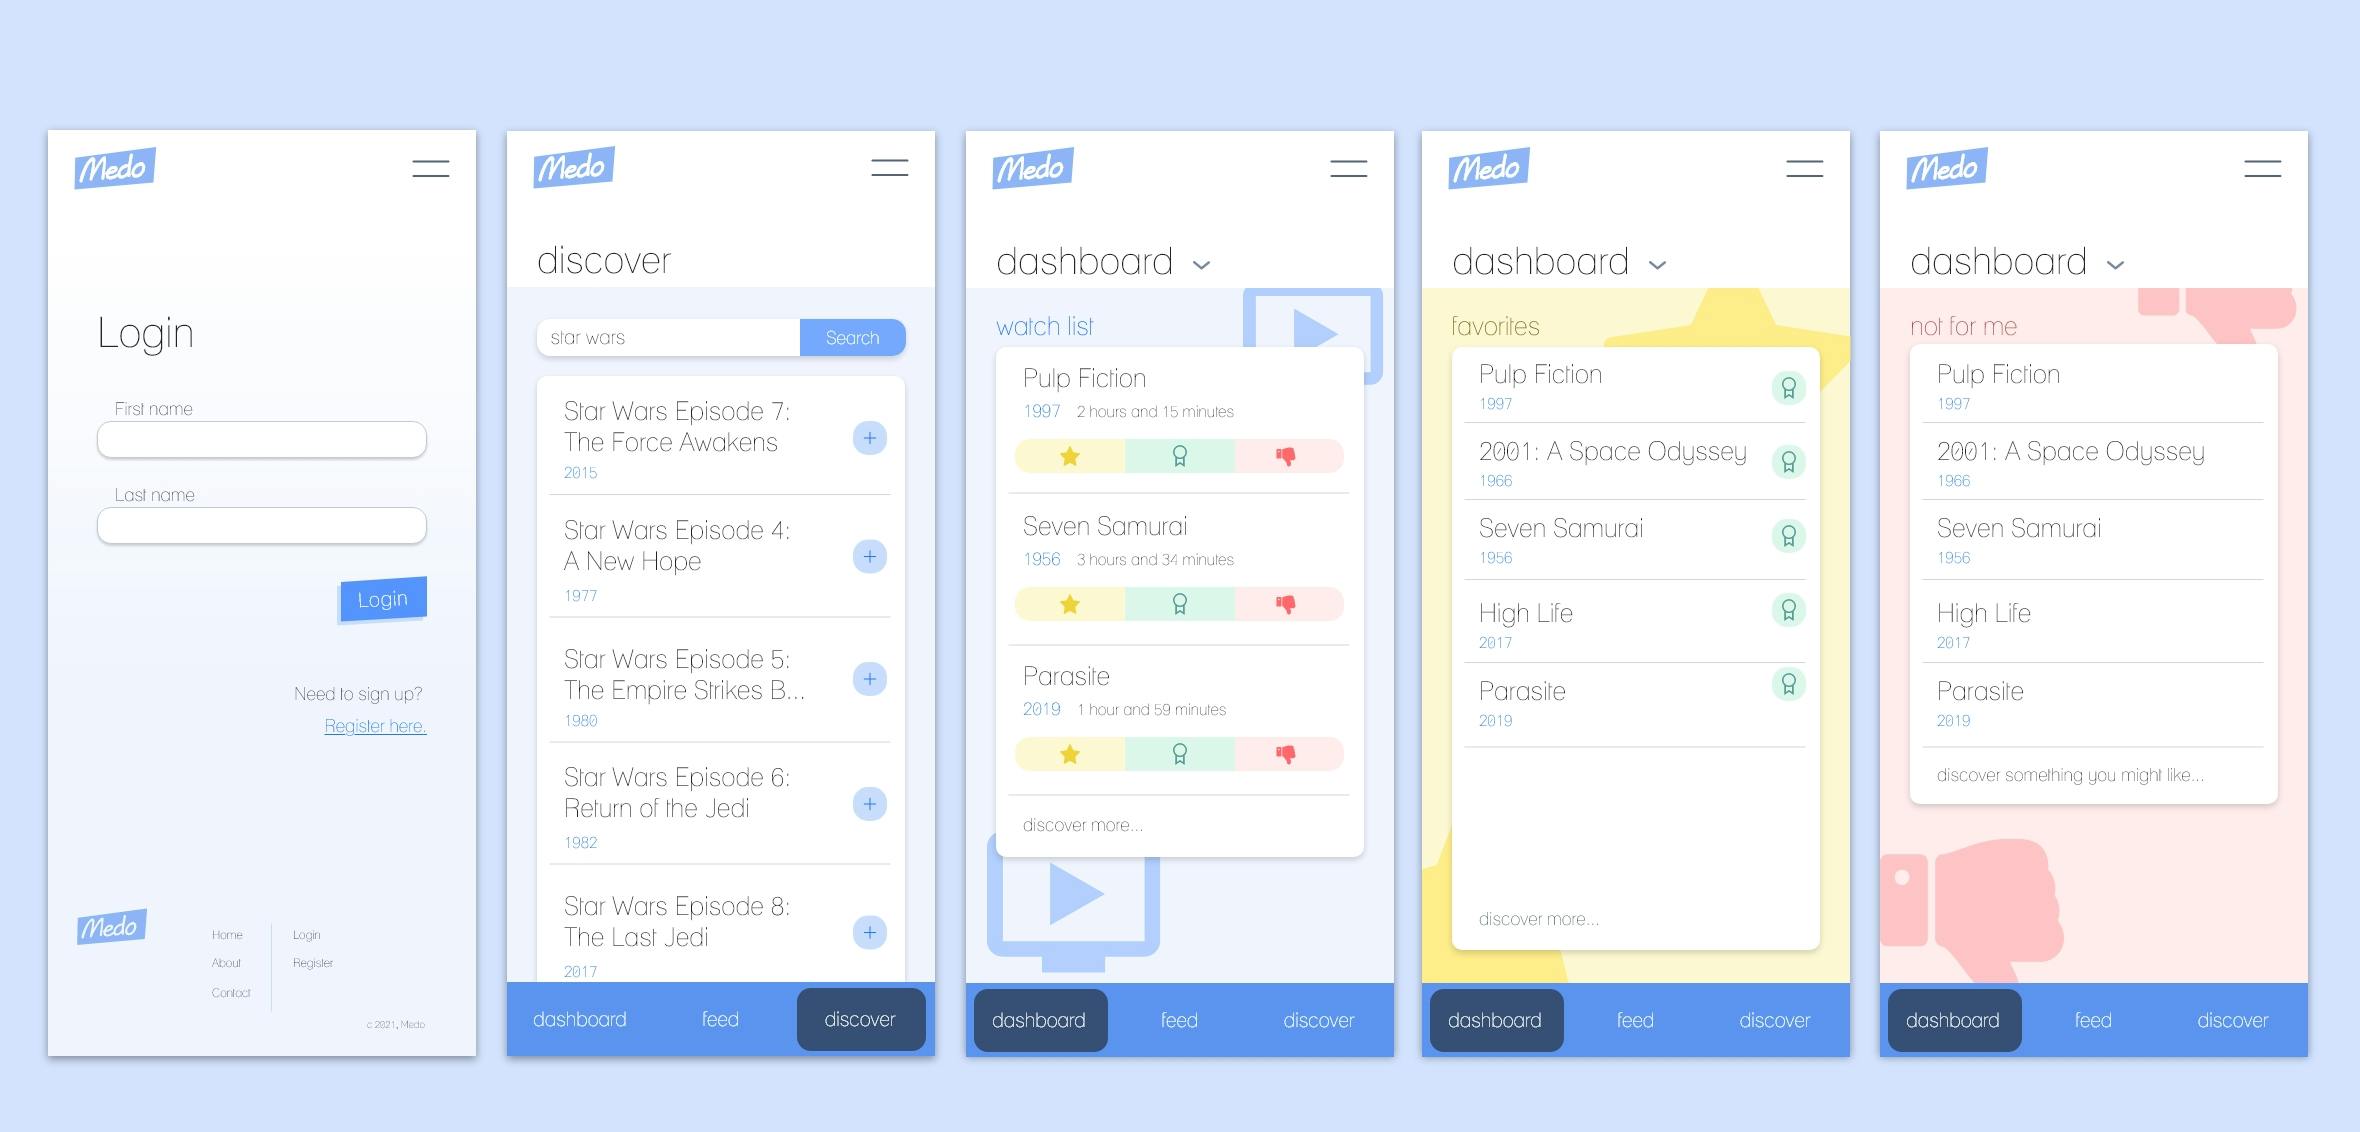
Since I love movies, I'm going to build a movie watch list app called Medo (I've never been good at names... 😞) and we'll be working off of the Adobe XD mock-ups pictured above. Some of our MVP requirements for the app will allow users will be able to:
- Login to their account using mock authorization. Later on, I'll get to using Firebase.
- Query movies from a movie database API.
- Manage the movies in their watch list. This includes organizing them into categories like favorites.
In the future, I'd love to make Medo a more social experience so that users can find friends, see what they've been watching, and make recommendations. But this is a start! So, let's wrap up this portion by setting up the project.
Project setup ⚒️
First things first, we'll need to get the Vue CLI installed. The CLI will help us get the app up and running quickly with things like SCSS, Vue Router, and Vuex.
If this is your first time, I would head over to the official documentation and follow the setup guide there. As long as you're familiar with Node and NPM, installation basically boils down to either npm install -g @vue/cli or yarn global add @vue/cli.
Update (6/29/2021): I was so excited to publish this that I forgot to tell you a crucial piece...after you install the CLI you'll want to create the app! To make sure the install was successful, quickly run vue --version and be sure that it spits out a version. Then simply running vue create [name-of-app] will set off the configuration process.
From there, I like choosing to manually set the configuration to use Vue 3, Babel, Router, Vuex, CSS Pre-processors, and the Linter / Formatter.
Then, we'll strip down the app so that only two simple views remain. It's important to note that only the template tags are required in .vue files, so the script tags are not necessarily doing anything (yet).
The Login view component:
<template>
  <main class="login">
    <h1>Login</h1>
  </main>
</template>

<script>
export default {
  name: "Login"
}
</script>
And the Register view component:
<template>
  <main class="register">
    <h1>Register</h1>
  </main>
</template>

<script>
export default {
  name: "Register"
}
</script>
We'll also create a couple of SCSS partial files in assets/css, where we're going to be storing variables and mixins. However, our Vue components won't be able to access those partials until we get them configured in a vue.config.js file at the root of our project. The lines we'll need for that can be found below. For more information config settings, I'd recommend - you guessed it - checking out the documentation.
module.exports = {
  css: {
    loaderOptions: {
      sass: {
        prependData: `
          @import "@/assets/css/_variables.scss";
          @import "@/assets/css/_mixins.scss";
        `,
      },
    },
  },
}
If you want to include formatting with Prettier, you can add "plugin:prettier/recommended" to the extends array inside the eslintConfig portion of our package.json:
  "eslintConfig": {
    "extends": [
      // ...existing options
      "plugin:prettier/recommended"
    ],
  // ...rest of the config settings
And create a prettier.config.js file to the root of the directory, where you can set all of your formatting options for consistency in your codebase:
module.exports = {
  tabWidth: 2,
  semi: false,
  singleQuote: true,
}
Now that the the basic setup done, we can move onto the fun part: building components 🥳. In my next post, I'll begin doing that by building out the Login page. Meanwhile, check out my last post where you can get to know me and my journey.